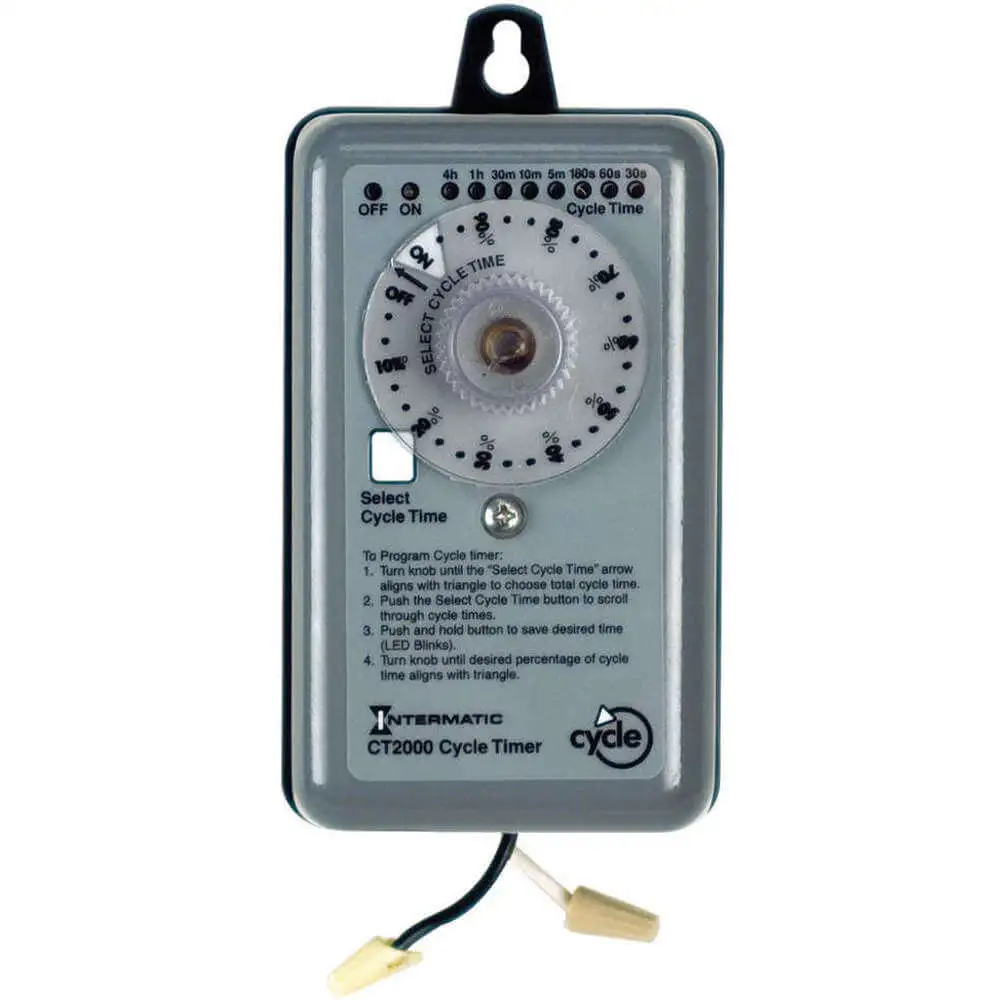
Intermatic CT2000 percentage cycle time switch is a field-adjustable timer that can be adjusted in the field to set repetitive cycle times using a control button right at the front. It is ideal for regulating equipment cycles based on percentage timing requirements, ensuring accurate control over equipment operation. This percentage time switch is used in the agriculture, manufacturing and automation industries.
Features:
- It provides 8 field-selectable options with cycling patterns ranging from 3% to 97% of the total time cycle.
- It features a control button on the front to permit up to 30 separate detent positions for precise selection of percentage 'ON' time.
- This manual ON / OFF control button also provides a temporary or permanent override, in case of power failure.
- The switch is capable of withstanding surges up to 6000VAC and is suitable for dusty, ammonia & wash-down environments.
Standards and Approvals:
Frequently Asked Questions:
Q. How is the timer mounted?
A. The timer enclosure includes two slotted mounting holes for a secure conduit connection with the device.
Q. Is the product corrosion-resistant?
A. CT2000 timer features an aluminium enclosure that is painted using an electrostatic process to eliminate the potential for corrosion.
Q. What are the 8 field selectable cycle durations?
A. 30 seconds, 1 minute, 3 minutes, 5 minutes, 10 minutes, 30 minutes, 1 hour and 4 hours.
Q. How to install Intermatic CT2000 percentage cycle time switch?
A.
- Choose where you want to place the timer.
- Loosen the cover screw, lift off the cover, and disconnect the circuit board cable.
- Securely attach the timer using 1 or 2 screws that fit well, at least 8 AWG size (screws not provided). If needed, use a drill to make the lower hole in the base. Once opened, secure the lower hole with a screw. Tighten the screws as needed, but not too much.
- Connect conduit hubs to the conduit before connecting them to the bracket. After inserting the hubs into the bracket, do this step carefully.
- Wire the timer following the National and Local Codes. Make sure Clock Power wiring connections match the specifications for 120 or 240 volts AC input. Adjust SW1 to the right position for 120V or 240V Clock Power (the timer is sent in 240V position).
- Make load connections as shown. Notice that the red wires are connected to isolated relay contacts, allowing the load to get power from a different circuit/voltage than the 'Clock Power'. Supply power to one of the Red wires and connect the other Red wire to your load.
- Connect all ground wires to the grounding lug/screw on the bracket.
- To put the cover back, do step 2 in reverse. Reconnect the circuit board connector and use the cover screw to secure the cover (avoid over-tightening).
- Finally, restore power to the timer at the disconnect or breaker panel.
Q. How to set Intermatic CT2000 percentage cycle time switch?
A.
- Rotate the knob until the 'Select Cycle Time' arrow lines up with the triangle to pick the total cycle time.
- Press the select cycle time button to cycle through different cycle times.
- Hold down the button to save the chosen time (LED blinks).
- Adjust the knob until the desired percentage of the cycle time aligns with the triangle.
Q. What safety measures should be taken before installing Intermatic CT2000 percentage cycle time switch?
A.
- Turn off power at the circuit breaker(s) or disconnect switch(es).
- Ensure that all necessary circuit breakers or disconnect switches are turned off to completely de-energise the equipment before servicing.
- Do not rely on the manual off position of the timer for equipment servicing.
- Always disconnect the power at the circuit breaker(s) or disconnect switch(es) when servicing.
Q. Are there alternative enclosure types available for thermostats besides galvanized steel?
A. Raptor Supplies has Johnson Controls thermostats with NEMA 1 and NEMA 4X rated enclosures. Customers looking for a NEMA 1 rated enclosure can opt for A70HA-14C temperature detection thermostat and those looking for NEMA 4X enclosure type can opt A19PRC-1C thermostat.
 Change Country


