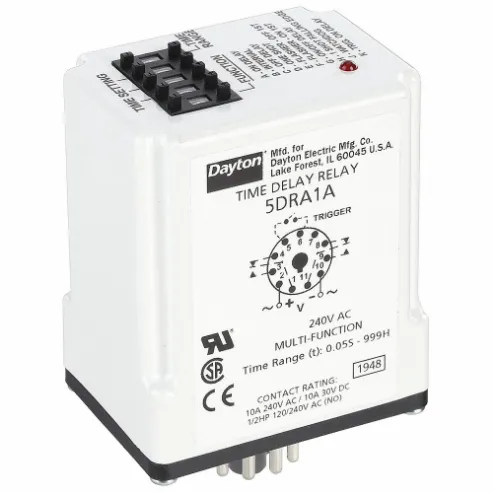
Dayton 5DRA3 timer relay in industrial and automation processes to control timing sequences in machinery, lighting systems and automated systems. This relay offers precision timing, enabling synchronised operations, cycle control and delayed functions. It enhances efficiency by automating processes, reducing manual intervention and optimising resource utilisation. This timer relay can be adjusted using push button and a rotary knob for easy handling and operations.
Features:
- Dayton 5DRA3 multi-function timer delay relay uses a pushbutton thumb wheel and a rotary knob to accomplish programming by selecting one of the seven built-in time ranges & one of the ten built-in functions, and digitally set the time delay required.
- It comes with an LED to indicate the time-out-condition and timing mode.
- This 24V timer relay allows plug-in mounting and has an octal base for quick installation.
- It offers a DPDT terminal connection and an analogue meter to display mode & timing delay.
- It features silver nickel contacts for hardness and corrosion resistance.
Compatible Accessories:
- Dayton Relay Sockets: 5DRA3 timer relay can be fitted with these relay sockets (1EGP2, 1EGP4 & 6X156). They provide electrical interfacing between the circuit and the relay.
Standards and Approvals:
Frequently Asked Questions:
Q. What are the functions of this timer relay?
A. This timer relay provides off first, on first, interval on, off/on delay, one-shot, the single-shot falling edge, flasher, triggered on delay and watchdog functions in a single unit.
Q. How many pins does this timer relay have?
A. It includes 11 pins for connecting to a relay socket.
Q. What is the time delay range of Dayton 5DRA3?
A. A user can select time delay ranging from 50 minutes to 999 hours.
Q. How to clean and maintain Dayton 5DRA3 timer relay?
A.
- Disconnect power to ensure safety during cleaning.
- Gently wipe the relay's surface with a clean, dry cloth.
- Ensure ventilation openings are clear of dust and debris.
- Do not use liquids, solvents, or cleaning sprays on the relay.
- Periodically check for any visible damage or loose connections.
- Seek professional assistance for internal cleaning or repairs.
- Keep the manufacturer's maintenance guidelines for reference.
- Store the relay in a clean, dry, and dust-free environment.
- Consider having backup relays and replacements on hand.
- Follow proper ESD precautions if applicable.
Q. How do I choose the correct timer relay for my needs?
A.
- Determine the required timing functions (delay, pulse, cycle).
- Choose a relay with a suitable time range for your application.
- Ensure the relay can handle your load's current and voltage.
- Select the appropriate mounting style (panel, socket, DIN rail).
- Choose the relay with the required number of contacts.
- Ensure the relay is compatible with your input voltage.
Q. What factors should I consider while choosing a timer relay?
A.
- Choose a timer relay that suits your required delay or timing function.
- Ensure compatibility with your system's voltage level.
- Select a relay with a time range that covers your desired delay interval.
- Determine if you need a normally open (NO) or normally closed (NC) contact.
- Choose a relay that fits your installation setup, like panel mount or DIN rail.
- Make sure the relay's contacts can handle the current and voltage of your application.
- Consider features like reset options, LED indicators and adjustable settings.
 Change Country


